You are currently at our United Kingdom website. We also offer a wide range of products with direct customer service in many locations worldwide.
All locations

Roadside truck tyre fitting

Truck tyre awareness

truck

Every year thousands of truck tyres are changed on site, but doing so away from a workshop can be challenging.  Here our instructor demonstrates how to do it safely.


The tools you'll need

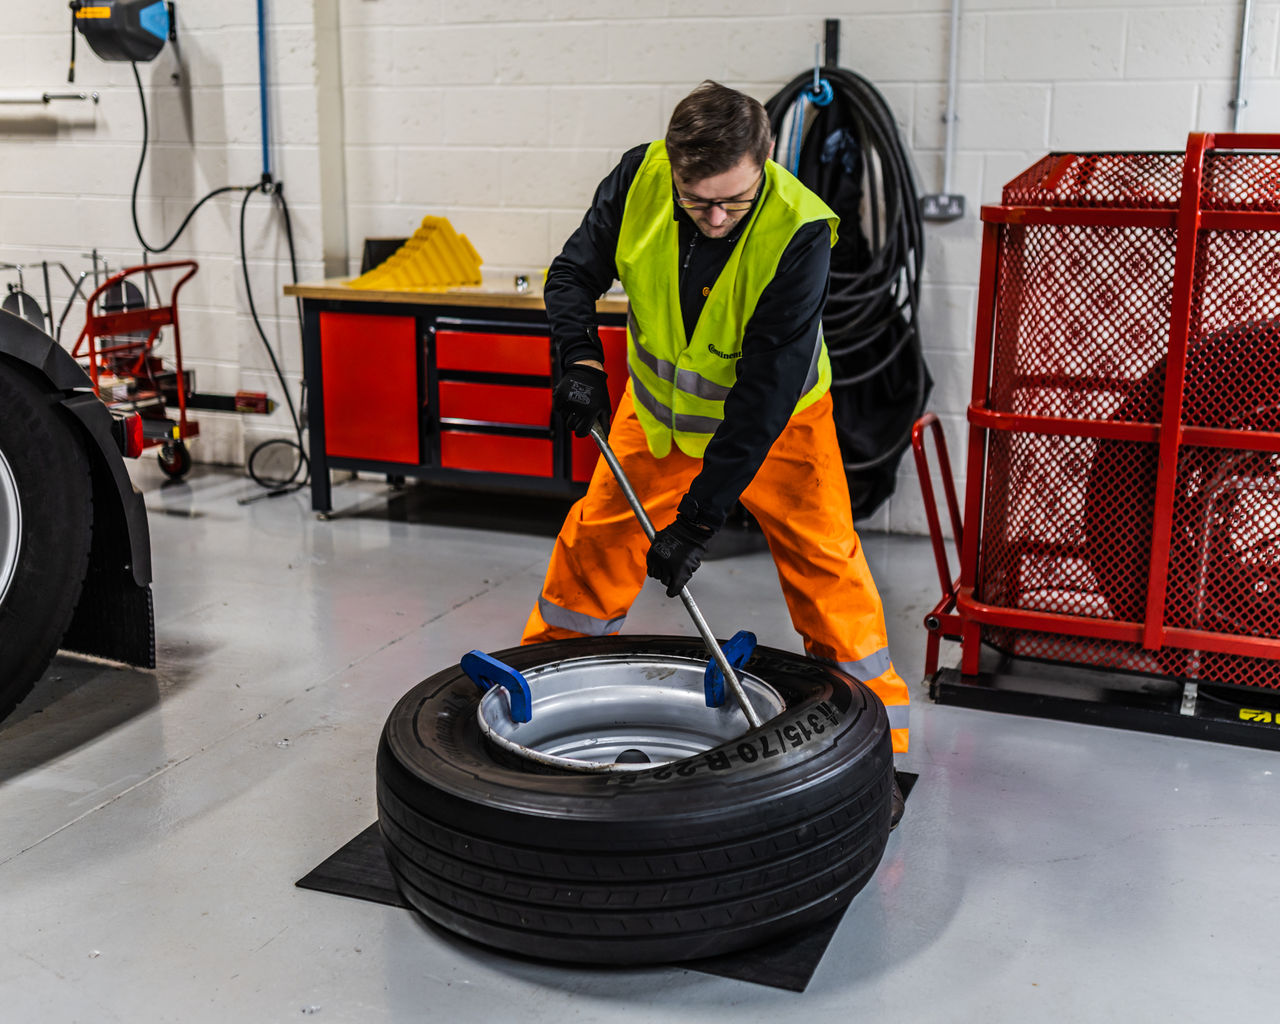
These are the tools you'll need. There's a valve core remover, tyre levers, bead clamps, tyre mounting and demounting lubricant, plus potentially a tyre bead seater for re-inflating the tyre. You'll also want some kind of mat to put the wheel on.  There are two reasons you put the wheel on a mat; you don't want to scratch the wheel rim and to stop it slipping around.  

Letting the air out

  • Then let the pressure out of the tyre.  You do this by removing the valve core. There's a lot of pressure in these tyres and you don't want the valve core firing out at you.  
  • It's also worth running a piece of heavy wire through the valve stem to make sure it's not plugged with bits of rubber or other debris.  
  • When the air has finished hissing you can release the tyre from the rim.  Always use tyre demounting lube first, then away from the workshop, Continental recommends using a bead breaker.  
  • Ensure the tool is correctly positioned between the tyre bead and rim flange at the angle so the force is applied at the correct point of the tyre.  Apply the force from the bead breaker tool at small intervals around the tyre until the bead is fully dislodged.  Make no more than two blows with the bead breaker at any one point or you could damage the bead. 
  • Using two levers and your body weight, slip the levers under the bead and lever it over the rim.  Stand on one of the levers so that it can't move and work the other one round the wheel, finally slipping the bead over the wheel rim. 
  • Turn the wheel over so that the outside is facing down.  Check the bead is dislodged from the rim flange on this side as well. Then apply a non-water based lubricant to both the rim and tyre beads to help the second side of the tyre slip over the wheel rim.

Inspecting the wheel and tyre

  • It's time to inspect and clean the wheel.  You're looking for cracks and any other obvious damage.  Use a wire brush to get rid of stubborn dirt and any rust from the wheel before cleaning it. 
  • It is always best practice to replace the valve for continued reliability and use a stud hole gauge to check the wheel stud holes are still the correct diameter.
  • With part worn tyres, pay particular attention to the condition of the beads and check to make sure any repairs are sound.  
  • Also, check to see if anything has penetrated the tyre. This might have led to secondary damage which could result in a zipper failure when the tyre is inflated.  
  • Ensure there's no foreign matter inside the tyre and only refit tyres that are legally compliant.  

Fitting the new tyre

  • First, you need to be sure you're fitting the correct tyre for the axle, so check that you haven't been given a drive tyre to put on a steer axle.
  • If it's a directional tyre, check that the arrow on the tyre you're fitting is pointing forwards. If the tyre has a symmetrical pattern, Continental recommends putting the serial number outside so that it's easily visible. 
  • To remount the tyre, first lubricate its bead on both sides, inside and out.  Then lubricate the wheel with the mounting paste.  
  • Position the tyre on the mat. It's important to insert the wheel into the tyre at the correct angle.  Use the flat lever to get the first part of the tyre over the rim flange. 
  • Move to the other side of the tyre and use your two clamps to stop the tyre bead following the lever around.  With the correct technique shown here, lever the bead under the rim flange.
  • The hardest part is getting the new tyre back onto the rim.  Be careful that in doing so you don't distort or stretch the bead area or damage the inside of the tyre.  

Inflating the tyre

  • When you start putting air in, you might have to roll the wheel around to get the bead to sit properly on the rim.  For speed, use a compressed air bead seating tool like this. 
  • Take extreme care at this point.  After the blast, remove ear defenders to listen for any popping or creaking noises as the tyre inflates.  If you do hear these, stop immediately; the tyre may be about to suffer a zipper failure, which is when the side wall blows out. 
  • Away from a workshop you probably won't have an inflation cage.  To stay safe while inflating a tyre you should stand to the side of it away from the potential blast trajectory. 
  • You should also have a minimum of three metres of hose between the clip-on chuck and the airline control.   
  • Inflate the tyre in two stages. Go to 1.5 bar initially, then inspect the tyre.  Make sure there are no bulges or potential separations and that the beads are sitting correctly against the rim flange.  Under no circumstances leave a wheel unattended during inflation. 
  • Truck tyres run at upwards of eight bar, so it might take a few minutes to inflate.  But once it is, always carry out the following checks:
  1. Check that the tyre is fitted evenly around the wheel
  2. Make sure there is no leaking air
  3. Inspect the condition of the valve core and make sure there's no leak.  

Explore our series of educational videos further